Test-Driven C#
 Hayden Hanson
Introduction
I like to learn new programming languages by building an intermediate difficulty project, like a web server for example. However, before jumping into something like that I find it best to solve about 20 leetcode problems with the language so that I learn the syntax for the language and some tricks. I personally use Neetcode and work through the roadmap.
This blogpost is guide on how to set up your own C# test-driven environment for solving leetcode problems locally, I personally prefer to do it this way so that I can use my terminal.
MacOS Specific Instructions
1.1 Install the DOTNET sdk
How? With Homebrew.
If you don’t have homebrew, install it. It’s a great package manager for MacOS.
/bin/bash -c "$(curl -fsSL https://raw.githubusercontent.com/Homebrew/install/HEAD/install.sh)"Go through the cli and press enter when prompted, you will need XCode command line tools, so be sure to accept when the homebrew cli asks.
If you are using an Apple silicon macbook, add brew to your PATH like so.
echo 'eval "$(/opt/homebrew/bin/brew shellenv)"' >> ~/.zprofile
eval "$(/opt/homebrew/bin/brew shellenv)"
Now we’re ready to install the .NET sdk.
brew install --cask dotnet-sdkLinux Specific Instructions
1.1 Install the DOTNET sdk
Install dotnet with your distros package manager.
I use Arch Linux, so I’ll install it using pacman.
sudo pacman -S dotnet-runtime dotnet-sdkThe rest of the instructions are for both Linux and MacOS
1.2 Create a Git Repository
Note: If you’re just here to get started right away, clone this repository from this commit. There are 20 problems set up with unit tests written. You can solve the problems and test your code as you go. More info on testing at the bottom.
For those following along:
I’m going to call mine cs-neetcode.
mkdir cs-neetcode && cd cs-neetcode

git init
touch .gitignore
echo "bin/\nobj/" >> .gitignore
This will create your local repository, and add the bin and obj directories to the gitignore.
1.3 Modular File System
The repository will look like this after we’re finished:
cs-neetcode/
│
├── TwoSum/
│   ├── TwoSum.cs
│   └── TwoSumTests.cs
│
├── ValidAnagram/
│   ├── ValidAnagram.cs
│   └── ValidAnagramTests.cs
│
├── Etc.../
│
├── cs-neetcode.sln
└── .gitignore
There will be a unique directory for each problem you want to solve.
Create a dotnet project and a solution file:
Run this command from the root directory of the repository.
dotnet new console -n cs-neetcode

dotnet new sln -n cs-neetcode
1.4 Preparing Solution Directories
Before using these commands, read this entire section. There is a useful sh script at the end that will automate this process.
For each problem, create a new class library and a corresponding test project.
Example for TwoSum:
dotnet new classlib -n TwoSum -o TwoSum
dotnet new xunit -n TwoSum.Tests -o TwoSum.Tests
Add the projects to the solution
You will do this for each new leetcode problem you solve
dotnet sln add TwoSum/TwoSum.csproj
dotnet sln add TwoSum.Tests/TwoSum.Tests.csproj
Link the test project to the problem project so that the tests can reference the solution.
dotnet add TwoSum.Tests/TwoSum.Tests.csproj reference TwoSum/TwoSum.csprojI have automated this process with the following shell script:
add_problem.sh
#!/bin/sh

# Run this script from the root directory of your dotnet project.

###########################################
# Add new problem to solve to the project #
###########################################

# Get the problem name
echo "Enter the problem name (e.g., TwoSum):"
read PROBLEM_NAME

# Create the class library project
echo "Creating new classlib for $PROBLEM_NAME..."
dotnet new classlib -n "$PROBLEM_NAME" -o "$PROBLEM_NAME"
echo "New classlib created for $PROBLEM_NAME."

# Create the xUnit test project
echo "Creating new xunit for $PROBLEM_NAME..."
dotnet new xunit -n "$PROBLEM_NAME.Tests" -o "$PROBLEM_NAME.Tests"
echo "New xunit created for $PROBLEM_NAME."

# Add projects to the solution
echo "Adding the projects to the root sln..."
dotnet sln add "$PROBLEM_NAME/$PROBLEM_NAME.csproj"
dotnet sln add "$PROBLEM_NAME.Tests/$PROBLEM_NAME.Tests.csproj"
echo "Successfully added the projects to the root sln."

# Add reference from the test project to the class library project
echo "Adding a reference for xunit to the classlib..."
dotnet add "${PROBLEM_NAME}.Tests/${PROBLEM_NAME}.Tests.csproj" reference "$PROBLEM_NAME/$PROBLEM_NAME.csproj"
echo "Successfully added a reference for xunit to the classlib..."

################################################
# Populate the default files with problem name #
################################################

# REFACTORING CLASSLIB FILES
echo "Refactoring the classlib files..."
cd $PROBLEM_NAME

defaultFile="$(find Class1.cs)"

if [ "$defaultFile" = "Class1.cs" ]; then
	# Remove the default file generated
	rm $defaultFile

	# Create new file and populate
	touch "$PROBLEM_NAME.cs"

	# Preview to terminal
	echo "public class ${PROBLEM_NAME}Solver\n{\n  public void ${PROBLEM_NAME}()\n  {\n    // Your implementation here...\n    throw new ArgumentException("No ${PROBLEM_NAME} solution");\n  }\n}\n"
	# Write to file
	echo "public class ${PROBLEM_NAME}Solver\n{\n  public void ${PROBLEM_NAME}()\n  {\n    // Your implementation here...\n    throw new ArgumentException("No ${PROBLEM_NAME} solution");\n  }\n}\n" >> "${PROBLEM_NAME}.cs"
fi

echo "Done."

# REFACTORING TESTING FILES
echo "Refactoring the xunit files..."

cd "../${PROBLEM_NAME}.Tests"

PROBLEM_NAME_TESTS="${PROBLEM_NAME}Tests"

defaultTestFile="$(find UnitTest1.cs)"

if [ "$defaultTestFile" = "UnitTest1.cs" ]; then
	# Remove the default file generated
	rm $defaultTestFile

	# Create new file and populate
	touch "${PROBLEM_NAME_TESTS}.cs"

	# Preview to terminal
	echo "using Xunit;\n\nnamespace ${PROBLEM_NAME}.Tests\n{\n  public class ${PROBLEM_NAME_TESTS}\n  {\n    [Fact]\n    public void Test${PROBLEM_NAME}()\n    {\n    }\n  }\n}\n"
	# Write to file
	echo "using Xunit;\n\nnamespace ${PROBLEM_NAME}.Tests\n{\n  public class ${PROBLEM_NAME_TESTS}\n  {\n    [Fact]\n    public void Test${PROBLEM_NAME}()\n    {\n    }\n  }\n}\n" >> "${PROBLEM_NAME_TESTS}.cs"
fi

echo "Done."

# Return back to the root directory
cd ".."

# Exit script gracefully
echo "Setup complete. Solution '$PROBLEM_NAME.sln' created with projects '$PROBLEM_NAME' and '${PROBLEM_NAME}.Tests'."
Be sure to make add_problem.sh executable:
chmod +x add_problem.sh1.5 Writing Tests and C# Code
The script above generates a testing file where you can write your tests like so:
TwoSum.Tests/TwoSumTests.cs
namespace TwoSum.Tests
{
    public class TwoSumTests
    {
        [Fact]
        public void TestTwoSum()
        {
            var solver = new TwoSumSolver();
            var result = solver.TwoSum(new int[] { 2, 7, 11, 15 }, 9);
            Assert.Equal(new int[] { 0, 1 }, result);
        }
    }
}
TwoSum/TwoSum.cs
Next you will implement your solution, test, debug and repeat until you get it right!
public class TwoSumSolver
{
    public int[] TwoSum(int[] nums, int target)
    {
        // Store the difference from target and its index
        Dictionary<int, int> numDict = new Dictionary<int, int>();

        for (int i = 0; i < nums.Length; i++)
        {
            int difference = target - nums[i];

            if (numDict.ContainsKey(difference))
            {
                return new int[] { numDict[difference], i };
            }

            if (!numDict.ContainsKey(nums[i]))
            {
                numDict.Add(nums[i], i);
            }
        }

        throw new ArgumentException("No two sum solution");
    }
}
1.6 Running Tests
You can test the entire repository by running the following command from the root directory of the project.
dotnet testTo test an individual leetcode solution, run the same command from the corresponding directory.
For example:
TwoSum.Tests/
cd TwoSum.Tests

dotnet test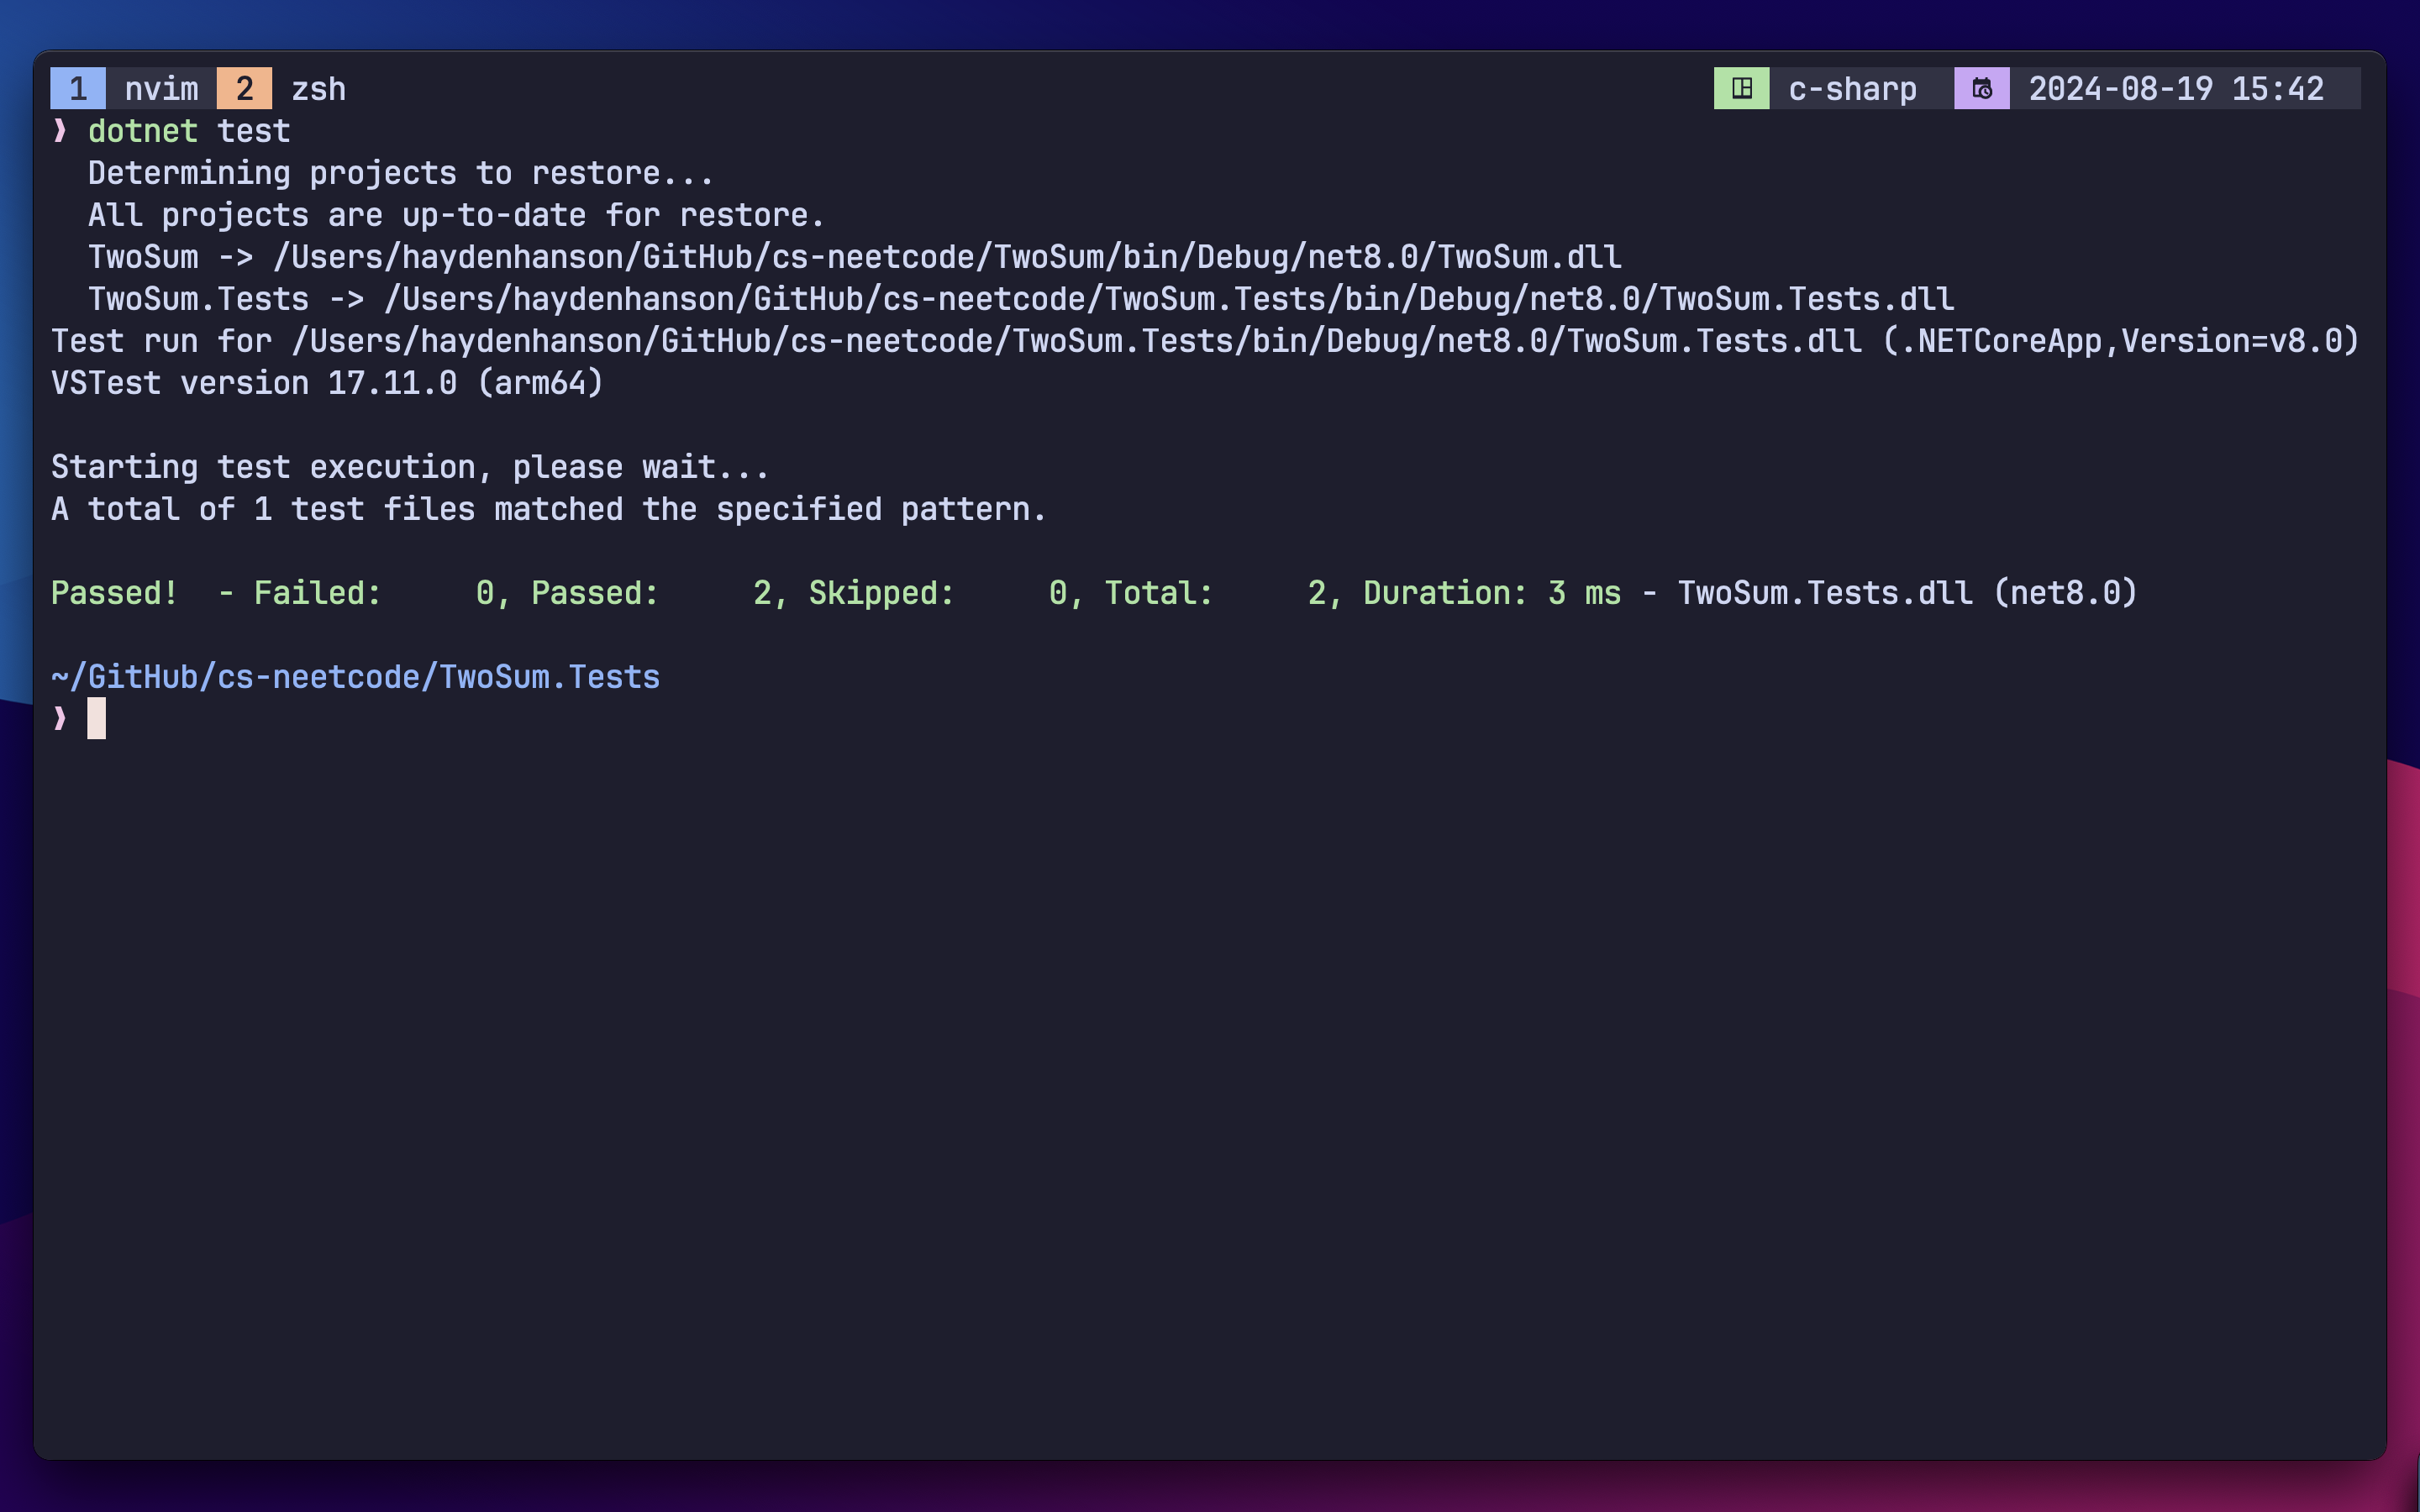
Happy Coding!